Support our content
If you find the tutorial helpful, you think that the work that I do is important and want to support my channel so I can keep creating content, or even create tutorials more often, please consider a contribution via Buy Me a Coffee
Introduction
Bricks Builder includes a powerful query loop that you can use to loop through posts, custom post types, custom fields, and much more. This makes displaying information in cards, sections, or any other form super convenient. You can create the content on your WordPress admin and then just loop through that content to display it with dynamic fields, this not only saves time but also provides flexibility in managing and presenting your content effectively.
While many of the modern visual WordPress website builders have a query builder (under a different name), the one in Bricks is the most powerful of those I have tried, all under a skin of simplicity, just how we like things in Ubuntu Productions.
And among other things, the Bricks Builder query loop allows you to sort/filter/feature and order the items you loop through quite easily. And that’s what we’re going to learn today, two simple techniques that will allow us to feature items using a custom true/false field, and order them using a custom text field.
But not only that, as an extra in the video I show you how to work with the ACF QuickEdit Fields plugin to make managing custom fields super easy and straight forward. 🤘🏽
Subscribe to our newsletter ✌🏽
Use-cases
But first, let’s look at some possible use cases for these techniques, so that you can understand why you might need to use them in the website you’re building. I am not going to cover every use case, I will just give you a single example and let you decide if the thing you need to accomplish is covered by these techniques.
Sort, filter or feature posts or custom post types
Here, you see a screenshot of a website we launched recently. This grid is displaying all the posts from a custom post type called “travel packages” using Bricks Query loop.

And here you can see a slider that is showing three of those cards that we have featured from the complete lists of posts. One of he advantages of the technique you can see in the video, is that the final user of the website can feature those posts that she/he wants in a very easy and intuitive way.

So, in summary, with this tool, you will be able to sort or filter the output of any post or custom post type within the Bricks query loop. Cool! 🚀
Order posts or custom post types
If you look at the screenshot above again, you can see that the posts that are featured on the slider are not in the same order as the posts that are displayed in the first grid. And that’s the use case for using a custom text box to order the posts the way you want.
You can use as many text boxes as you like to order the posts in different grids, but not only that, you can use the same text box to order the output of the posts when you loop within a series of custom post types. In this case, the feature slider above loops through three different custom post types called “Travel Packages”, “Groups” and “Companies”, and uses a simple text field to order the output through all of them. Amazing!
The video tutorial
So, in order to explain in the best possible way how to achieve this, and as I mentioned earlier, to do it using ACF QuickEdit fields to simplify the management of the custom fields that will sort or order the posts, I created a YouTube video where I explain step by step how to do it in a simple, clear and understandable way. suffice to say that the feedback I have received from this video has been extremely positive 😊.
A short version
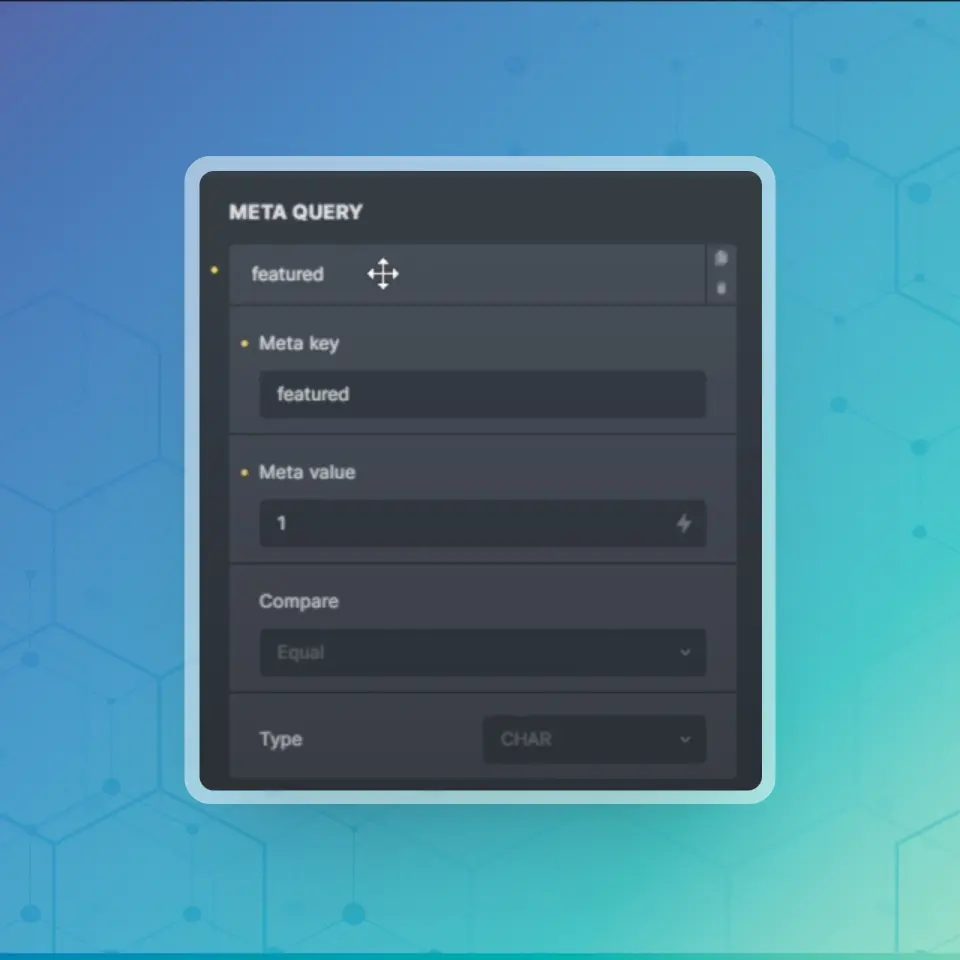
But if you already know how to work with query loops, and all you need to know is how to achieve the things we’re discussing here, I won’t let you invest the time to watch the whole video, and here you see how you need to configure the query loop in order to achieve it.
To short short, feature or filter them you will add a “meta query” inside the query loop. As “meta key” you will use the name of your custom field (don’t confuse it with the label), and in the “meta value” field you will write 1 if you want to show the ones that have a “true” value, or 0 if you want to show the ones that have a false value. That’s it.

And in order to order them in the way you want, you will want to select “meta numeric value” on the Order by dropdown, and use the name of the text custom field (not confuse with the label) as a meta key.

That’s all for today. I hope you found this content empowering and super useful. Please consider donating on the Buy Me A Coffee link at the top of this post. And remember that only by helping each other, only by loving each other, we can create a kinder and nicer world to live in as humans.
Love from Korpo 💚

